August 11, 2012

Math revisited...

  "Why will I ever in my life need to know the formula for the circumference of a circle!?!" Little-Squirrel asks.
"Well one day," answers Big-Squirrel from the future, "in the distant future, you will want to make yourself a skirt and that darn formula will help you calculate the waist and the diameter of a whole skirt!" 
Little-Squirrel just rolled her eyes. "Sure, whatever."

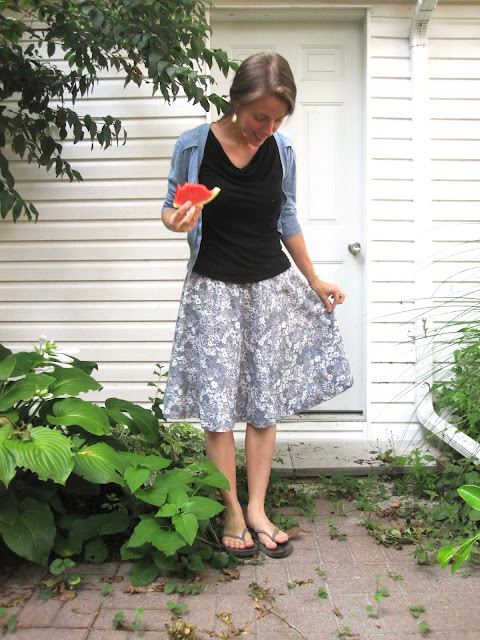
Guess what? I number-crunched my very own half-circle skirt! It was not as complicated as it sounds, though, I did enjoy math as a kid. I will try to explain without making it too complicated...

I measured my waist (plus 2 inches) for the half-inner circle; only half the circle is my whole waist measurement. And then doubled it to get a whole circle's circumference.
Then using the handy-dandy formula C=2πr, I calculated the radius of the waist and made a small circle with that radius from paper (inner circle in diagram). I folded the small circle in half and decided on the length of the skirt. I measured the length from the edge of the half-circle and drew another larger circle, cut the smaller circle away, and there it was: my very own, made-for-me, pattern.

The waist band was two long rectangles. I attached them to the slightly gathered skirt-waist by sandwiching the skirt between the waist pieces (right sides facing in), stitching, folding them up and hand stitching the top edge (I didn't want any top stitching to show).
I added a lining using the same (but shorter) pattern  out of a lightweight white cotton and inserted an invisible zipper. Hand stitching the hem took awhile because of the rounded edge of the skirt, but I enjoyed several Olympic track events and some swimming.
I am really thrilled about this skirt. It's a nice light weight for the summer and it feels just so great.

July 21, 2012

Stripes: Part Two

 
A striped Kirsten kimono t-shirt for the summer! This is a simple free pattern from Maria Denmark, and I am so in love with this shirt! We've had some very humid days this past week and this shirt was very light and super cool to wear.
The pattern consists of a front and a back. That's it! Unless you decide to bind the neckline (which I did not) so it went together very fast. I used my double needle to top stitch the hem, sleeve and neck lines for a nice simple finish.

Check out Scruffy Badger's site to find many versions of this shirt. I especially love the birds-on-a-line version. I hope to get a chance to make a few more, but first I need to go in search of some knits. I am thinking I may try to add thick sleeve bindings on my next one...not sure how that would turn out on a kimono style shirt...
This pattern is so quick you'll even have enough time to play with the dog. Lucky guy.   :)

July 15, 2012

Stripes: Part One

A striped dress fit for a wedding. Actually, two weddings!
I fell in love with this material as soon as I saw it. And it's quilting cotton. (Tilly has a great post on sewing with quilting cotton, here). I loved the colours, the stripes and even the price. Until the clerk cut the fabric and gave me the bill... um... definitely more than I was planning to spend per yard. The fabric was not labeled clearly enough... the real price was hidden beneath the fabric in the bolt. I loved it anyways, but the pressure was now on to make a great dress!


So I started with sketches. I couldn't figure out how I wanted the stripes to lie originally, and I also had to figure out how cutting the pattern out would affect the way the stripes matched up later.
 Stripes are not easy to sew with. Surprise! Oh, didn't you know? Matching the stripes on the circle skirt wasn't too bad, it's when it came time to add darts to the bodice that I was the most concerned. Thankfully, with a very helping mother to help with fit, we were able to puzzle out this dress.

The pattern was adapted from one my sister passed down to me from a beautiful dress she made herself for a wedding! It must be that kind of dress. I love the full circle skirt; it's so much fun to dance in and twirl in, but watch out for those breezes!
I added a keyhole to the back of the bodice with a button made by my sister. I really wanted to find a way to display the button, and as long as I wear my hair up, I think I've been successful. It's a wooden button cut from a branch from an old walnut tree from my Grandmother's backyard. Even more special.
 Well, after all the worry about fit and stripes, the only concern I had on the days I wore the dress were... wrinkles. Darn. Cotton wrinkles when you sit on it.
 But if you dance fast enough no one will ever notice.  ;)  Cheers!

July 3, 2012

Jeans for the summer

I received some hand-me-down jeans from a friend a few weeks back and with the summer weather starting to peak I thought I'd alter some into a pair of capri pants. Easy-peasy! I just tried the pants on, marked them and then cut at the desired length.

I did add slits on each leg just about 2 inches long to add extra movement to the legs. I seem ripped up to where I wanted and then pinned the new hem in place to hold it. I did reinforce the bottom of the seem on the side leg just to prevent any unwanted seem ripping. I used a golden heavy weight jean thread to top stitch the cuffs and the slits like traditional jeans. I used bright red thread to top stitch the top of the slits to add a colour top stitching detail which copies a similar original detail on the bum pockets.
  
A fairly easy upcycling project for a new pair of pants and I've already gotten a lot of wear out of them. Maybe one day I'll share my rediculous jean collection with you...and no...they are not found in my wardrobe.  :)

June 12, 2012

In the mean time...

I promise I'm alive still. I have just started back at school and I am learning a balance between school, rest and sewing. As much as I love my craft times, I don't find starting new projects a relaxing activity. I enjoy the process, but I've learned that it's better to start something new with a fresh set of eyes and a brain free of gobbledygook so I can properly understand the instructions.
That all said, I do have a few projects on the go, and two new remnant bin finds for future Sorbettos, or variations there of.
In the mean time I will share a past project with you which I have been meaning to publish anyways.


The Baby Quilt


 Well, one of them. I have made a few, but sadly, forgotten to take photos before giving them away. This one I made using lots of scraps from my quilting fabrics, remnant bin finds and some really fun prints that were a birthday present. I did buy the bright blue and the orange striped cotton to bring the whole blanket together.
 
Instead of traditional quilting, intricate hand-sewn (or machine) patterns, or even my usual machine sewn rows, I decided to hand quilt the outlines of the small animals across the blanket. It worked out very nicely, and was a great lap project for a few long car rides in the passenger seat. Hopefully the young gift-recipient will enjoy the blanket just as much as I enjoyed making it.

May 14, 2012

My very own Darling...

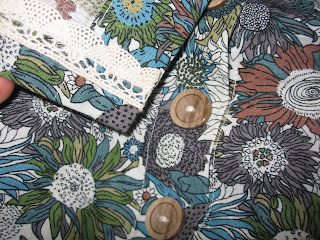
I have been slowly been making a sleevless version of the Darling Ranges dress...and tada...here it is! (Though after looking through the photos, I think I will take a bit of time to add on the ties at the back). I love, love, love this print; I knew what it would become as soon as I saw the bolt.

I had every intention of altering the pattern for this version so that the neck line didn't dip so low, but I guess I was too excited and I forgot until after the whole front was traced and cut. Next time...

I made buttons holes for only the top 4 buttons (I figured this out by using my brown D.R. dress and checking which buttons I had left undone the last time I had worn it), saving lots of time and sanity. I also attached all of the buttons by machine...I forget where I read about it...but wow... Great tip!

And because I thought it would be fun, the hem is finished with lace on the inside of the skirt. :)  Next up... I have some jeans I am going to try to refashion and fit.

But first...a hilarious shot of me trying to spread some dandelion seeds.  Harhar.

May 4, 2012

Pink stripes!

From the remnants bin I discovered some fun pink-striped knit and it had just enough for a short sleeved Renfrew top.
I decided to give the v-neck a try; still working on getting the stretch just right...the neck band is a little bit floppy. I really wanted all the bands (neck, waist and arms) to have opposing stripes, so I cut them against the stretch of the fabric...and the waist band is the only one that is a tad bit tight. I even stitched in a ribbon on the inside back neck seem to help distinguish the back from the front (though with a v-neck it isn't as hard to do). Same sizing as my earlier Renfrew top.
I really love this pattern. It is so quick to make up. Hoorah.
Now...maybe you can find Waldo in all that fabric mess on the floor!