Showing posts with label top. Show all posts

March 4, 2013

Belated Birthday Shirt

 Though it may be a few months late, I have finally finished making a mens button-up shirt as a birthday gift for my husband. It has been a long project because I worked at first on making a muslin to try the fit, I adjusted the pattern and I worked slowly just to make sure I didn't make any mistakes.
This pattern is McCall's 6044 and it is a very straight forward pattern. There are several great versions already made out in blogger world: four square walls; true bias; Dixie DIY. I chose to do view A with the addition of the back yolk from view E becuase it matched an already owned 'favourite' shirt in his closet.
I chose to top stitch in a blue-grey thread, and scrounged up a set of matching buttons from my stash that even went with the shirt! The yolk and front button plackets were done on the bias; I liked the look of the diagonal plaid.
Unfortunatley, even with my attempts to fit the shirt using a muslin, and to customize it ahead of time, it came out too small and does not fit comfortably. The actual buttons for this version won't be serving any other purpose other than decorative.  :(  Lesson for next time, maybe the pattern sizing isn't so rediculously huge.
 (Pull lines when arm is raised and too tight to use the buttons properly)
Anyways, I was thrilled to see the shirt actually being worn this morning, even though it needs to be worn over a t-shirt. I'm really happywith the finished product (minus the fitting issues); I took my time and it paid off: no use of the seam ripper was part of this project ... ok, ok, except for making the button holes.  :)

February 11, 2013

Monday's shirt

Started Sunday afternoon, and here I am wearing my new t-shirt on Monday.
I've used a wonderful light knit for this shirt and used the Kirsten Kimono Tee pattern from Maria Denmark. This time I decided to add thick waist and sleeve bands and a small neck band. Both the arm and waist bands are about four inches wide (eight total before folding them in half), and the neck band is 3/4 inches (one and 1/2 before folding). The last version of this shirt that I completed, I just hemmed all of the edges and top stitched with a double needle, and though it looks fine, I am still not entirely happy with the finish on that one.
(My new iron and a lot of cold snow and icicles!)

The sleeves bands are a tad too big; if I do this again I think they need to be shaped, rather than one large rectangle sewn on.


 I marked the back of the shirt with a small piece of ribbon. The front and back of this shirt can look exactly the same early in the morning.  :)

What got me through this: DIY Dixie's Never fear Knits, Tasia's Sewaholic Renfrew pattern and Maria Denmark's pattern!
 At the very least, this project has helped get me out of a sewing funk.

July 21, 2012

Stripes: Part Two

 
A striped Kirsten kimono t-shirt for the summer! This is a simple free pattern from Maria Denmark, and I am so in love with this shirt! We've had some very humid days this past week and this shirt was very light and super cool to wear.
The pattern consists of a front and a back. That's it! Unless you decide to bind the neckline (which I did not) so it went together very fast. I used my double needle to top stitch the hem, sleeve and neck lines for a nice simple finish.

Check out Scruffy Badger's site to find many versions of this shirt. I especially love the birds-on-a-line version. I hope to get a chance to make a few more, but first I need to go in search of some knits. I am thinking I may try to add thick sleeve bindings on my next one...not sure how that would turn out on a kimono style shirt...
This pattern is so quick you'll even have enough time to play with the dog. Lucky guy.   :)

May 4, 2012

Pink stripes!

From the remnants bin I discovered some fun pink-striped knit and it had just enough for a short sleeved Renfrew top.
I decided to give the v-neck a try; still working on getting the stretch just right...the neck band is a little bit floppy. I really wanted all the bands (neck, waist and arms) to have opposing stripes, so I cut them against the stretch of the fabric...and the waist band is the only one that is a tad bit tight. I even stitched in a ribbon on the inside back neck seem to help distinguish the back from the front (though with a v-neck it isn't as hard to do). Same sizing as my earlier Renfrew top.
I really love this pattern. It is so quick to make up. Hoorah.
Now...maybe you can find Waldo in all that fabric mess on the floor!

April 16, 2012

A shirt to make my sister jealous...

My first successful knit top! Tres excitant! My first one was made from a self-drafted pattern I copied from a favourite shirt: and the pattern worked out great. The problem was I didn't know yet that the stretchy part of the material needed to stretch horizontally to help when putting on the shirt, but even more importantly (as I have learned) so it doesn't sag off your shoulders.
This was a shirt I made in one day too! The Renfrew top from Sewaholic. Everything, from pattern tracing, to cutting, sewing, unpicking, and sewing again. Amazing. I even used my twin needle for the first time (that took a lot of practicing to get the stitches and tension to work out correctly).
I still find knit material challenging. I had to weigh down the fabric with anything heavy I could grab my hands on and I'm still perfecting the neck band and stretching it.
I made a few changes to the pattern, the first was shortening the 3/4 length sleeves by 1 3/4 inches and the second was not basting the neck, arm and waist bands before attaching them. I couldn't figure out how to baste them and still keep them stretchy enough to fit the main torso of the top. Oh, and I used a size 4 arms, size 6 at the top of the front, and size 2 everywhere else. I feel pretty happy with the fit.
Why does it make my sister jealous? Because it's her favourite colour! Leprechaun green (I've been told).

April 12, 2012

The best gifts are handmade...

...just like this Darling Ranges dress my sister made me for Christmas. I can't help but wear it even when it's a quiet day at home. I love the buttons; pretty ceramic ones. (It looks so great with those wool socks! Ha.)
Another project completed today. I finished the Sorbetto top for my mom.
It's made from an old button-up blouse of her's that she never wore because she says she didn't like the fit. So she saved the material and I snatched it up for this project. I inserted an invisible zipper on the side (I find my blue-plaid Sorbetto is tricky enough to put on without)...and even though it's bright pink...you can't see it! :) The back of the top has an inverted pleat (opposite from the front).

April 10, 2012

Using up old scraps.

I have boxes of scraps. Yes it's true. Some are even just big enough to SQEEEEZE a top or skirt out of too!
I was able to make this Sorbetto from a blue plaid shirting cotton (I think). It's very thin, so I doubled the bias tape (bright!) on the bottom. My muslin was too short, so I added a strip on the bottom with the plaid on the bias. That's my favourite part actually. I also lowered the bust darts, which were too high to start. I followed a tutorial on BurdaStyle for this, but only lowered them on the final version...oops...too low now. I cut out a size 4 on top and tappered down to a 0 on the bottom (!). I find it very hard to believe that that is a true size 0.
I'm going to attempt making one for my mom from an old blouse of her's.

Next scrappy project is the free paperbag skirt tutorial from Suzannah Adventures in Dressmaking. I used some smoky-green, stretchy woven 'stuff'. (I don't know a lot about materials yet...)
I had to cut down the amount of fabric at the waist because I didn't have enough. My pleats are just smaller. Though I've played with invisible zippers lots, this was my fisrt 'real' zipper. Easy-peasy. (But I've learned backwards, right?). Any ideas on how to get the pleasts to fall more naturally?
Like the socks? ;) Oh, and the skirt is not hemmed yet, but I was too excited. Mmm, tea.

Learn to stick to what I like...

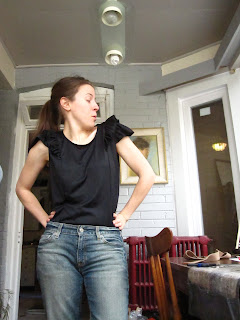
I 'finished' my Pendrell top a few weeks ago. I say that in quotations because I have yet to hem it. The thing is... it's not my favourite. Why did I ever think wearing anything in a stretchy polyester would be my thing?Though sewing this top was very straight forward, there are a few things I have done wrong.

Firstly, I have made the wrong size; I'm pretty sure about this. There is too much fabric around the waist and the back, even for a tucked in top: I like things more closely fitted. I still have no idea if I should be attempting an FBA on some patterns. It seems like a lot of work.
Secondly: wrong choice of material. Even though I was trying to upcycle an old dress...the lining was a lining for a reason. It's stretchy, thick, and does not iron flat. Actually, none of seems are flat. Lesson learned. Choose cottons. I like cottons.
Third: there are too many ruffles for me. I should've listened to my sister...but the other tops I've seen look so great. Well, maybe I'll try the bell sleeve next time.
However: I am still learning. It was not an expensive project. Following a Sewalong was so helpful. Pattern was really easy to understand. On to the next project. :)